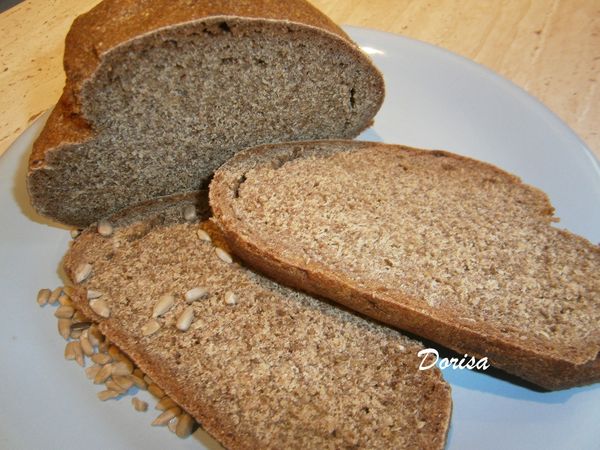
Sourdough rye-wheat bread “odoka”

Last Updated on
ingredients
Sourdough
3 tbsp rye sourdough approx.400g rye flour approx.350g lukewarm water
Indredients for breads:
leavening residue 1 kg organic wheat bread flour (regular wheat bread flour has also worked well for me) approx 100g spelt wholemeal for kneading 1.5 tsp salt 2 tsp ground raceme approx 450ml lukewarm water
progress
Baking sourdough bread is like playing the lotto for me. I usually win with sourdough, but these two breads came out as a caress to the soul after two unfinished large loaves. My oven does what it wants. The bread baked ahead of schedule. You knock and there’s a hollow sound, you pull it out of the oven, let it cool, and then after slicing it, you bow your head sadly because it’s sticking. When baking sourdough bread, you need to know the temperatures and keep an eye on the oven. At least with ours. I often dream of the brick oven of our “apu”. In it, bread must have been like a fairy tale. And they did bake sourdough, grandpa used to say. He ate bread even with semolina porridge. He used to say there was poverty in the war, so he enjoyed it even on days when there wasn’t. Apo ours. I’m not an advocate of weighing ingredients. I didn’t avoid weighing in the early days of sourdough baking though. I’ve learned to work progressively with sourdough starter and lots of leavening so that the dough always comes out good, however you combine it. This progress is recorded in videos, baked by lay bakers, I offer you my experience, tested by months, tested by everyday breads. The members of the various bakers’ groups on Facebook also offer amazing experiences, without them I’d probably have thrown the sourdough away a few times already. So, if you start baking with sourdough and straight up dare to make bread, this quicker recipe might be good for you. From the batch of flour that I “odoka” you will make two smaller baking sheets. As my husband says: “the more bread, the more crust”
1.
I’ll explain: “approx” – means that we base the leaven according to the quality of the sourdough starter. If the sourdough is properly bubbled, it will also raise more flour in the leaven. I always knead a thicker leaven. Always if I have 12-15h time to work it at room temperature of about 20 C°. Sometimes, when I set the starter overnight, I make a slightly thinner slurry and let it work closed in the oven (not turned on.) It is a stable temperature there. Then about 8-10h later I work it into a dough. You can see what the starter is supposed to look like in my video, link above. I was able to process two loaves from this amount, weighing about 600g after baking. (I didn’t weigh them but they weighed about that much).
2.
Make the porridge, preferably in a glass bowl, cover with clingfilm and store in a temperature stable place without draughts or high radiator temperature. The bloom is done when it picks up in volume, you can see bubbles absolutely everywhere in the “slurry” and preferably on the surface as well. Do not leave it in high heat or work it for too long (you can see this by the bubbles) , it may become overheated and turn into sourdough bread.
3.
Don’t forget to remove three tablespoons of the finished leavening into a jar(you can see how to remove again in my video from the list on my page). Refrigerate the jar with the starter and leave it for further baking.
4.
Prepare two smaller loaf pans or sieve – colanders covered with a clean gauze or cotton cloth (washed without fabric softener) and sprinkled with starch flour, semolina, semolina ….I also like buckwheat flour, but I do not like its taste on bread.
5.
If you want, you can also watch my video how to knead the dough. It will give you a better understanding of the resulting consistency
6.
In the bowl where we kneaded the leaven we also knead the dough. Add the flour, then salt and cumin to the leaven, mix the dry ingredients from the top with a spoon and add the water progressively to the middle by stirring the dough from the middle with the spoon. The dough must be elastic. Depending on the quality of the flour, you may use less or more water. Use a knife to divide the dough into two parts and knead the loaves.
7.
Cover the loaves with bowls and leave them to work for two to three hours, kneading them every half hour without adding more flour. Then turn the dough into a plastic wrap , cover with a tea towel and refrigerate for about 8-20h (as long as you can bake).
8.
Then heat the oven to the highest temperature ( approx 250C°) and turn the loaves out onto a baking tray (lined with baking paper) and bake for 15minutes and then reduce the temperature to 200- 180C° for approx 25-35 minutes.
9.
The loaf is baked when you hear a hollow sound when you tap it. Remove to a wire rack and let cool for 2-3 hours.
10.
TIP: after tipping out of the loaf pan onto a baking sheet covered with baking paper or Teflon foil, you can take a razor blade and pick out different ornaments in the loaf.

